7 Tips for Better Schanz Screw Application?

High-energy trauma continues to challenge orthopedic teams worldwide. The World Health Organization’s Global Status Report on Road Safety 2023 estimates approximately 1.19 million road deaths annually. Millions more sustain disabling limb injuries. These cases often demand rapid stabilization, especially when swelling, contamination, or limited operating-room access affects treatment decisions.

Schanz Screw Application is central to many temporary and definitive external fixation strategies. Correct placement can protect soft tissues, preserve alignment, and simplify later reconstruction. Poor placement may injure neurovascular structures, weaken fixation, or complicate future surgical approaches. Small details matter. Drill direction matters. Pin spacing matters.

This guide presents seven practical tips for safer and more consistent Schanz Screw Application. It draws on principles from the AO Surgery Reference, orthopedic trauma education, and accepted surgical safety practices. These sources emphasize anatomical planning, imaging, pin-bone interface quality, and repeated alignment checks. However, clinical evidence is not perfectly uniform. Technique selection still depends on fracture pattern, bone quality, patient condition, and surgeon experience.

Think beyond the screw itself. A preoperative image, a marked safe corridor, and a firm final stability check can prevent avoidable problems. Yet no checklist replaces judgment. Even experienced surgeons can misjudge soft-tissue tension or drill trajectory under pressure. That deserves honest attention.

The following recommendations focus on preparation, insertion technique, frame mechanics, and postoperative review. They are educational, not a substitute for institutional protocols or specialist supervision. Consistent practice helps, but careful reassessment remains essential.
7 Tips for Better Schanz Screw Application?

Understanding Schanz Screw Design and Clinical Indications

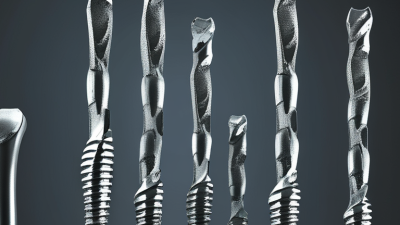
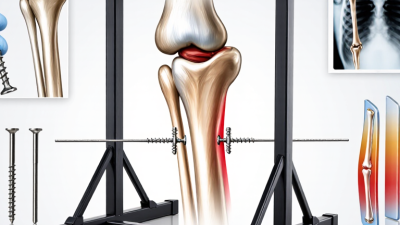
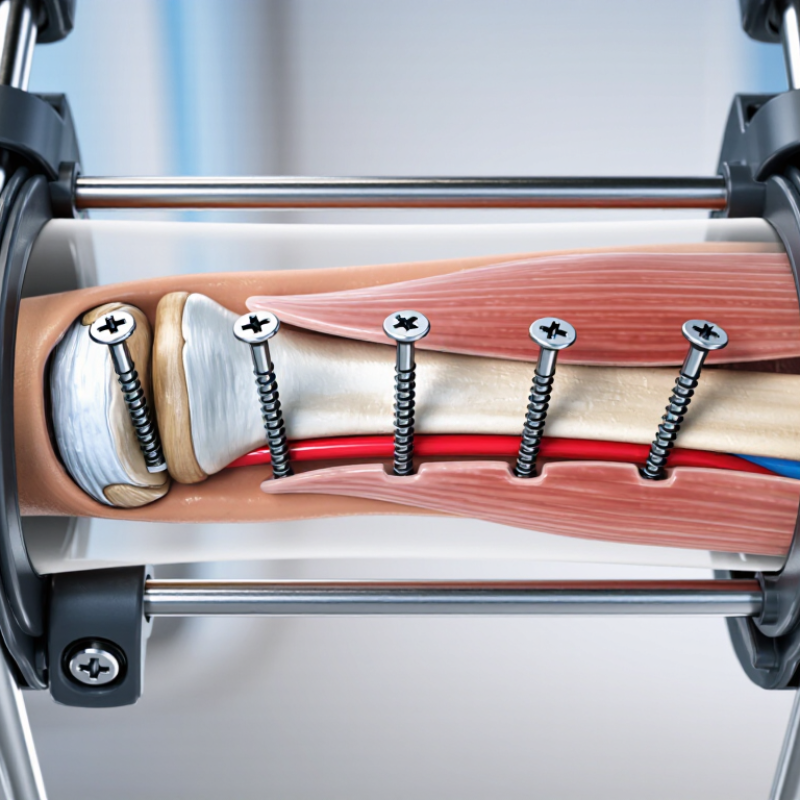
Schanz screws are half-pins designed to connect bone with an external fixation frame. Their threaded section provides bone purchase, while the smooth shank supports controlled frame attachment. Design details matter. Thread diameter, pitch, length, and core strength should match bone quality and the planned load. A longer thread is not automatically better.

Tip 1: Match the screw to the anatomy. Choose a safe corridor with enough cortical purchase, while avoiding joints, nerves, and major vessels. Tip 2: Plan the frame before drilling. Pin position affects reduction, stiffness, and later access to wounds. Tip 3: Respect soft tissue. A small incision, gentle spreading, and accurate drilling can reduce thermal and tissue injury. Keep the pin cool.

Clinical indications include temporary stabilization after high-energy trauma, definitive external fixation in selected fractures, and staged treatment when swelling makes internal fixation unsafe. Schanz screws also support deformity correction and controlled lengthening. Their value depends on the whole construct, not the pin alone. Bone density, fracture pattern, contamination, and patient mobility must guide the plan.

Tip 4: Avoid placing pins too close to the fracture. Tip 5: Use imaging when anatomy is uncertain. Tip 6: Check frame stiffness from more than one direction. Tip 7: Reassess after reduction. A frame that looks stable can still loosen. In practice, even experienced teams may overestimate fixation strength in weak bone. That is worth questioning. Pin-site care, scheduled review, and clear weight-bearing instructions remain essential. Final decisions require trained orthopaedic assessment and local clinical protocols.

Preparing the Patient, Instruments, and Surgical Field

7 Tips for Better Schanz Screw Application?
Preparing the Patient, Instruments, and Surgical Field

A safe Schanz screw application begins before the patient enters the operating room. Confirm the indication, imaging, consent, and planned pin corridors with the surgical team. Position the patient to support reduction, fluoroscopy, and access to the intended entry sites. Protect pressure points carefully. Small positioning errors can restrict imaging later.

Prepare instruments systematically. Check the correct screw lengths, diameters, guides, drills, depth gauges, clamps, and sterile covers. Keep backup instruments available. They matter when a guide bends or a measurement seems uncertain. Mark the operative side and review nearby nerves, vessels, joints, and growth plates. Use strict skin preparation and draping, while preserving enough exposure for accurate trajectory control.

During insertion, maintain a stable hand position and avoid unnecessary force. Confirm the entry point and direction with appropriate imaging before advancing. The screw should achieve secure purchase without violating a joint or endangering soft tissue. Recheck alignment after fixation, not only before it. A checklist helps, but it cannot replace judgment. I still find that rushed preparation causes more problems than difficult anatomy. Pause when resistance, poor visualization, or unexpected bleeding changes the plan. Document screw position, imaging checks, and any intraoperative concern for postoperative review.

7 Tips for Better Schanz Screw Application? - Preparing the Patient, Instruments, and Surgical Field

Tip Preparation Area Recommended Practice Why It Matters Key Check Risk to Limit
1 Patient assessment and positioning Confirm the indication, fracture pattern, soft-tissue condition, neurovascular status, allergies, and relevant medical history. Position the patient to provide stable access to the planned pin sites and maintain unobstructed imaging. A stable position improves control of the limb and helps the surgical team maintain the intended reduction and pin trajectory. Document baseline pulses, motor function, sensation, and the planned pin locations before preparation. Unrecognized neurovascular compromise or inaccessible pin sites
2 Plan the safe corridor Review appropriate anatomic corridors using clinical examination and imaging. Avoid joints, open physes, fracture lines when possible, major neurovascular structures, tendons, and areas of compromised skin. Pin placement should maximize bone purchase while minimizing injury to soft tissues and critical structures. Mark intended entry points with the limb in its operative position and confirm that the frame will not interfere with later treatment. Nerve, vessel, tendon, joint, or growth-plate injury
3 Prepare and inspect instruments Verify the availability and sterility of the Schanz screws, drill or power driver, sleeves, soft-tissue protectors, guide instruments, measuring tools, clamps, connecting rods, irrigation, and backup components. Correctly functioning instruments support controlled insertion and reduce avoidable delays or unplanned changes in technique. Check screw dimensions, thread type, driver compatibility, battery or power supply, and instrument integrity before draping. Instrument failure, wrong component, or loss of sterility
4 Optimize the surgical field Perform appropriate skin preparation and sterile draping that leave the planned pin corridors, the injured limb, and the imaging field accessible. Keep the operative field free of unnecessary cables and equipment. Good exposure supports accurate localization, soft-tissue protection, and consistent aseptic technique. Confirm that the image intensifier or other imaging system can obtain the required views without contaminating the field. Contamination, poor visualization, or restricted access
5 Protect the soft tissues Use a small skin incision when needed and maintain a soft-tissue sleeve or protective guide during drilling and screw insertion. Minimize stripping and avoid trapping skin around the pin. Soft-tissue protection reduces tissue wrapping, thermal injury, pin-site irritation, and damage to nearby structures. The protector should remain centered on the planned entry point and advance without excessive force. Soft-tissue injury or postoperative pin-site problems
6 Control drilling and screw insertion Use the appropriate pilot technique for the bone and screw system. Maintain the planned trajectory, apply controlled advancement, and use irrigation or other approved cooling measures when needed to limit heat generation. Controlled technique helps preserve bone quality and promotes secure fixation while reducing the risk of thermal necrosis or loosening. Watch for excessive resistance, loss of trajectory, poor purchase, overheating, or unexpected breakthrough. Thermal bone injury, malposition, or inadequate fixation
7 Confirm fixation and complete documentation After insertion and frame assembly, assess alignment, stability, pin depth, soft-tissue tension, and clearance from joints and important structures. Obtain appropriate imaging and document the final construct. Final verification identifies malposition, loss of reduction, or unstable connections before the patient leaves the operating room. Record screw locations, sizes, frame configuration, imaging findings, neurovascular status, and the postoperative pin-care plan. Unrecognized instability, malalignment, or incomplete handover

Clinical note: Schanz screw placement should be performed by appropriately trained surgical personnel using the applicable operative technique, imaging protocols, and local infection-prevention standards.

Selecting Safe Entry Points and Insertion Angles

7 Tips for Better Schanz Screw Application?

Selecting a safe entry point requires more than surface landmarks. Review the limb in the planned frame position. Mark the joint line, palpable bone edges, and known neurovascular paths. The AO Surgery Reference recommends placing pins through safe corridors and avoiding muscles that cross multiple joints. Entry should provide solid cortical purchase without entering the joint. Use imaging when anatomy is distorted, swelling is severe, or previous surgery has changed landmarks. A small skin incision helps prevent soft-tissue wrapping around the drill.

Tips:

  1. Tip 1: Palpate before prepping.
  2. Tip 2: Check two imaging views.
  3. Tip 3: Keep the screw outside the joint.
  4. Tip 4: Aim through the safest corridor.
  5. Tip 5: Start perpendicular to the near cortex.
  6. Tip 6: Reduce heat with controlled drilling.
  7. Tip 7: Recheck the trajectory before tightening.

The insertion angle should match the bone surface and planned frame. Excessive angulation can reduce purchase and increase bending stress. A shallow angle may also place the far cortex or nearby soft tissue at risk. This is easy to underestimate.

Published reviews in Injury and the Journal of Orthopaedic Trauma report pin-site infection rates commonly ranging from about 10% to 30%, depending on definitions and follow-up. That range is not a prediction for every patient. It shows why entry planning, tissue handling, and follow-up matter.

Experienced surgeons still revise their landmarks when swelling changes the visible anatomy. I would not rely on a familiar angle alone. Verify depth, corridor, and final alignment before applying load.

Applying Controlled Drilling and Screw Placement Techniques

Controlled drilling and precise screw placement are central to reliable Schanz screw application. Plan each entry point using imaging, soft-tissue landmarks, and the intended frame geometry. A pilot drill should remain aligned with the bone axis. Excessive pressure can generate heat and damage the cortex. Keep irrigation available, especially in dense cortical bone. The AO Surgery Reference emphasizes safe corridors and careful protection of nearby neurovascular structures.

Tip 1: Stabilize the limb before drilling.

Movement can turn a planned bicortical purchase into an uneven track. Use a sharp drill, advance steadily, and avoid repeated passes. A 2019 review in EFORT Open Reviews reported pin-site complication rates commonly ranging from 10% to 30% across external fixation studies. Technique matters, but patient factors and follow-up also influence these figures.

Tip 2: Confirm depth and trajectory before final tightening.

The screw should obtain adequate purchase without unnecessary protrusion. Check both anteroposterior and lateral images when available.

Tip 3: Leave enough clearance around the skin and frame.

Swelling changes quickly, and a tight construct may become a pressure problem.

I still find that hurried drilling causes more preventable errors than difficult anatomy. That is worth reflecting on.

A 2021 systematic review in Injury also linked improved pin care and monitoring with fewer pin-site problems, although protocols varied between studies. Inspect the skin, document findings, and reassess alignment after every adjustment.

Checking Stability, Alignment, and Postoperative Results

7 Tips for Better Schanz Screw Application: Checking Stability, Alignment, and Postoperative Results

Schanz screws should support the reduction, not rescue a poor one. Tip 1: Confirm the entry point with two-plane imaging. Tip 2: Choose safe corridors and avoid neurovascular structures. Tip 3: Use adequate bone purchase, especially in osteoporotic regions. Tip 4: Keep the screw trajectory controlled. A loose frame rarely improves alignment.

A 2023 systematic review of external-fixation studies reported pin-site infection rates ranging from 0% to 30%, depending on definitions and follow-up duration. Tip 5: Record skin tension, drainage, and screw mobility at every review. Tip 6: Compare postoperative radiographs with the planned alignment, including length, rotation, and angulation. Small errors can become functional problems. Tip 7: Reassess stability after swelling decreases and patient movement increases. The AO Surgery Reference emphasizes repeated clinical and radiographic assessment during staged fixation care. Good images matter.

Do not trust the first postoperative film too much. It may look acceptable while rotation remains unrecognized. A 2022 review in Injury linked malalignment after lower-limb trauma with poorer functional recovery, although study methods varied. That limitation deserves attention. Document pain, limb perfusion, neurological findings, frame integrity, and pin-site condition. When findings conflict, discuss them with the treating orthopedic team rather than relying on one measurement.